Graveyard Keeper 2 Alchemy Guide: Runes, Labo and Folio
Graveyard Keeper 2 alchemy explained: study ingredients at the Study Table, match red, green and blue runes in the Labo, and craft Dream Dust and potions.
FAQ
How does alchemy work in Graveyard Keeper 2?
How do I unlock the alchemy lab in Graveyard Keeper 2?
Why is my ingredient rejected by the Labo?
How do I make Dream Dust in Graveyard Keeper 2?
Do I need a flask to craft a potion, and where do flasks come from?
Quick answer
Alchemy in Graveyard Keeper 2 is a research-and-match loop rather than a recipe list you unlock in one go. Study an ingredient at the Study Table to learn its red, green and blue runes, then blend studied ingredients in the Laboratory (the Labo) so the rune totals equal a formula exactly. Every formula you discover is recorded in the Folio, and a finished potion also needs an Alchemy Flask taken from the Flask Shelf.
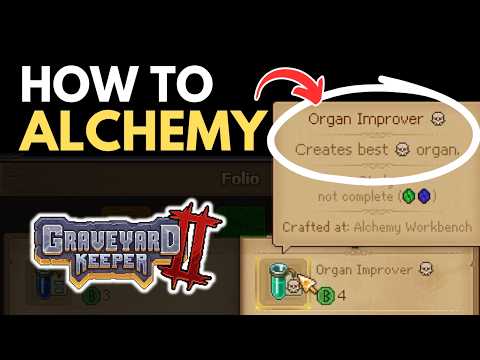
How Alchemy Works in Graveyard Keeper 2 — Recreational Suffering
Both walkthroughs used for this page were recorded just before or on the 22 September 2026 release day, and the primary one is pre-release demo footage, so the rune numbers visible in the screenshots are demo or day-one values rather than numbers from a later patch. Station costs and item tables come from this site’s community research notes for patch 1.007, which are data-mined rather than officially confirmed. Where the two disagree, the page says so, and the live Folio in your own save always wins.
1. Unlock the alchemy lab
The lab sits behind the townsfolk quest line. The beginner walkthrough walks the chain in order, and the steps below follow what is on screen:
- Help two townsfolk. The gratitude counter in the quest log moves when you supply the village tradesman with crops such as wheat, and when you mine clay in the corner of your home base, turn it into pots and gift them to the twins.
- Collect the introductions in town. Go to the inn in the main town and ask to bring July out. He then sends you home to speak with Jerry.
- Watch the cutscene and take the hatch. After the conversation the basement hatch opens, and the Plague Doctor area becomes yours to use.
- Meet the three stations. The area already contains the Flask Shelf, the Labo and the Study Table, so there is nothing to build before your first experiment.
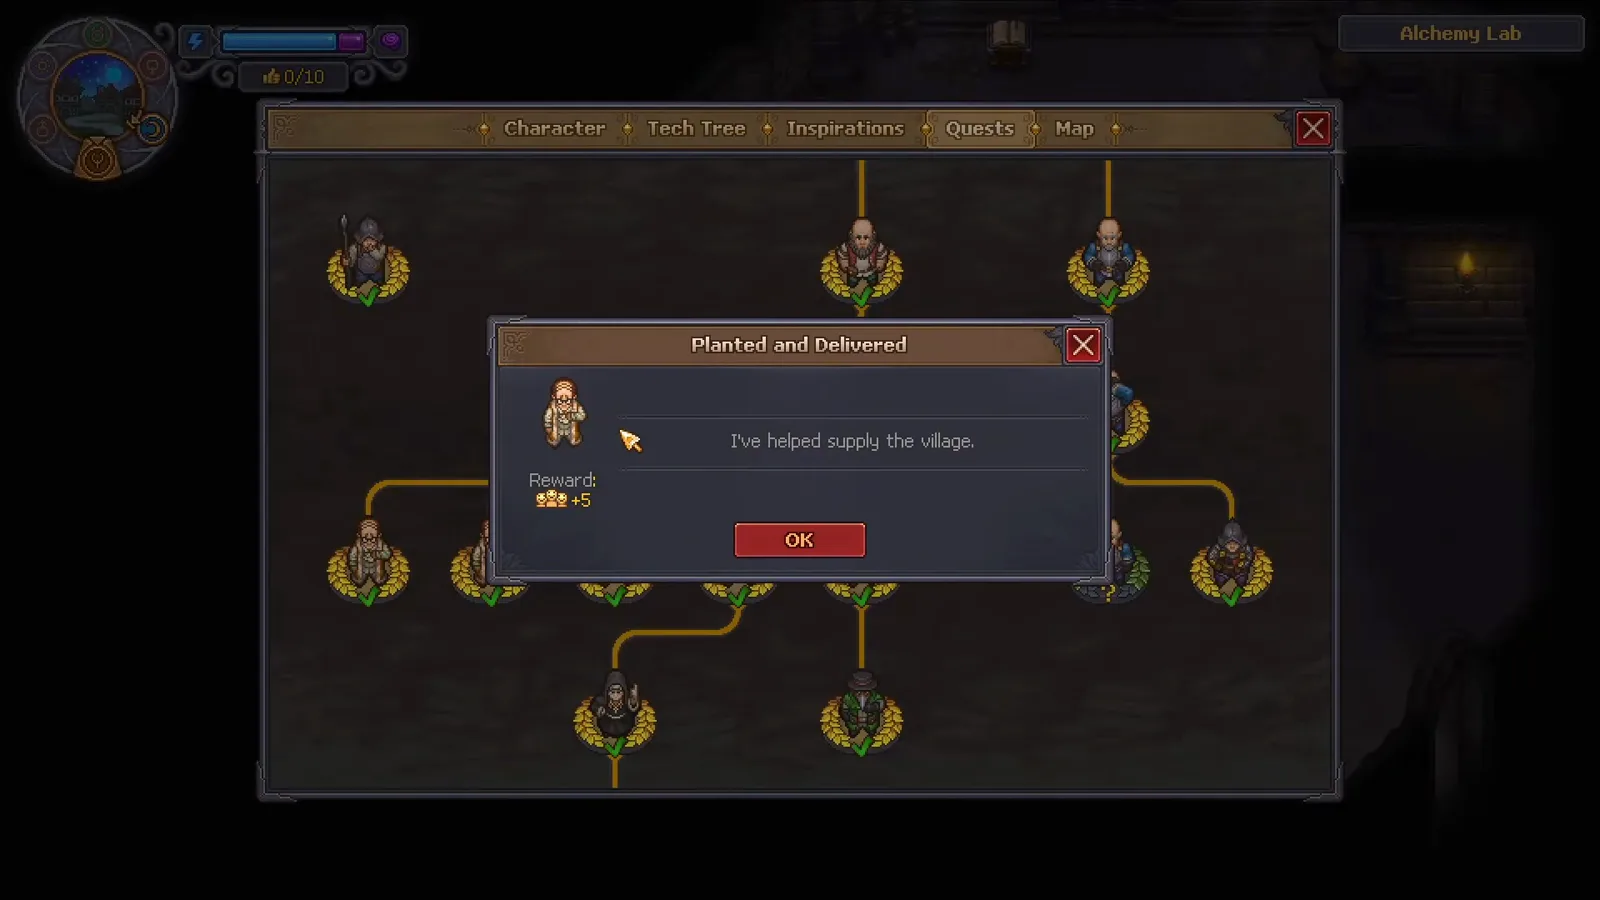
The unlock path runs through the townsfolk help quests; supplying the village is the step the walkthrough highlights before July sends you home to Jerry. Source frame: Sinxi at 0:29.
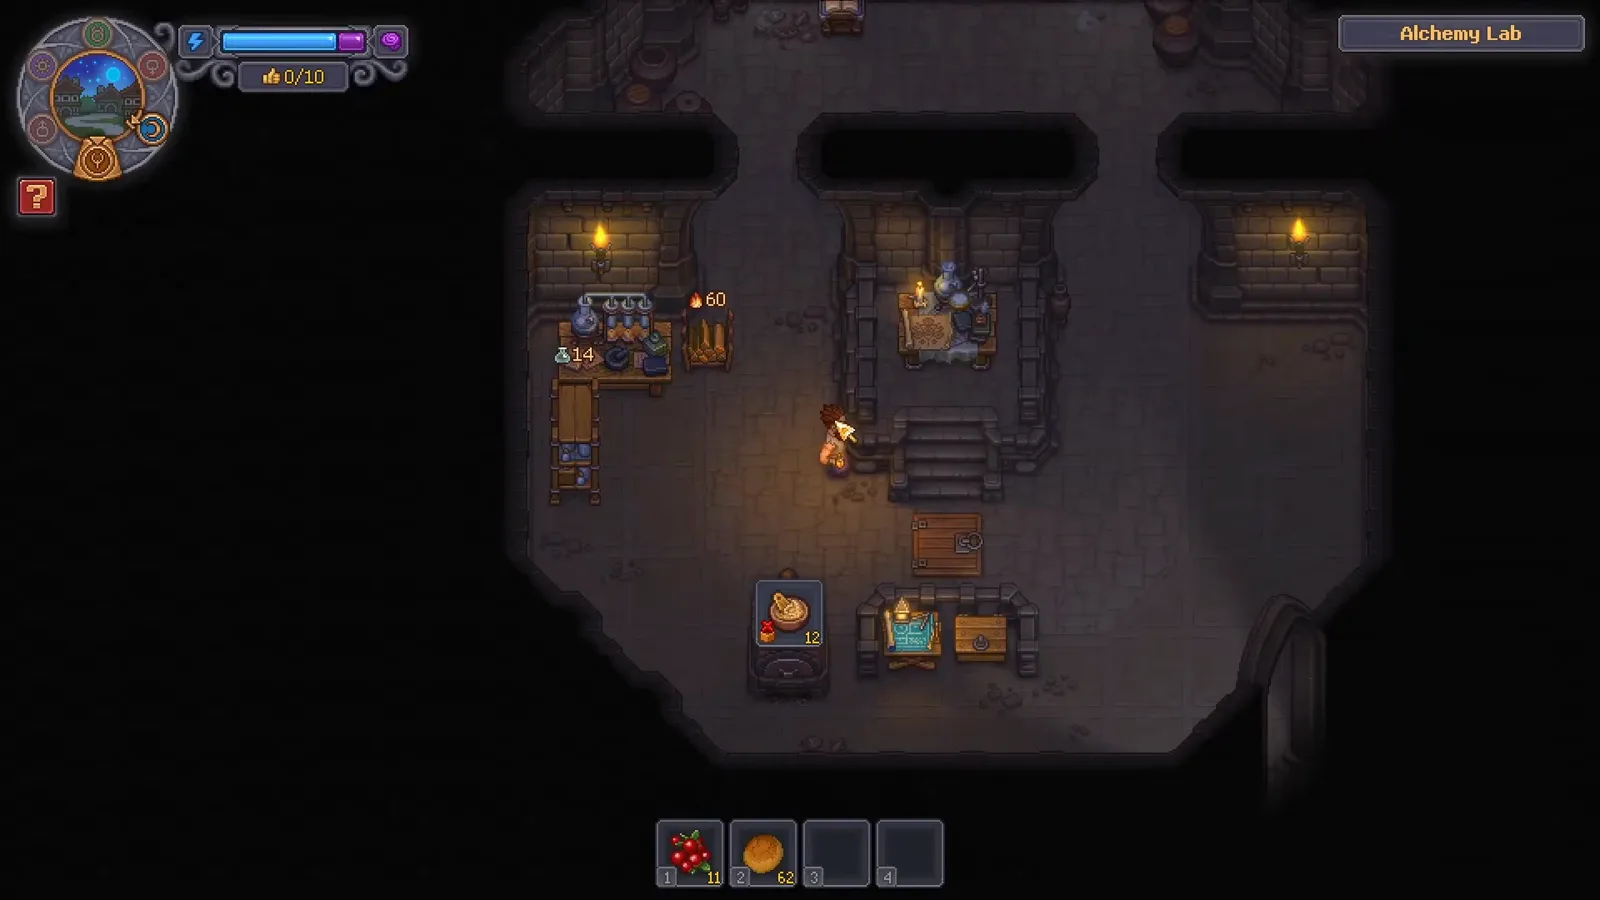
Three stations share the room: the Flask Shelf for bottles, the Study Table for research, and the Labo where the runes are combined. Source frame: Sinxi at 1:22.
2. Study ingredients at the Study Table
Research is the gate on everything else. The Study Table lists the items you carry, and an entry only becomes usable in the Labo after it has been studied:
- Open the Study Table and pick an item. Unresearched entries are marked as not studied, and the panel asks you to choose an item for study.
- Pay the research cost. In the checked walkthrough, studying one item costs one Faith and one Science. Science is the research currency; the tooltip points at Paper and Science Kits, which come from the Writing Desk, while Faith comes from sermons.
- Work the study action. Research is a craft-like action, not an instant purchase, so the item finishes studying only after the work step completes.
- Read the tooltip afterwards. In the same run, studying Stone returned two red runes, which is the value you then match against a formula.
Not every item pays off. The creator notes that Alchemy Flasks, skins and fat produced no runes at all, so part of early alchemy is trial and error with a limited Science budget.
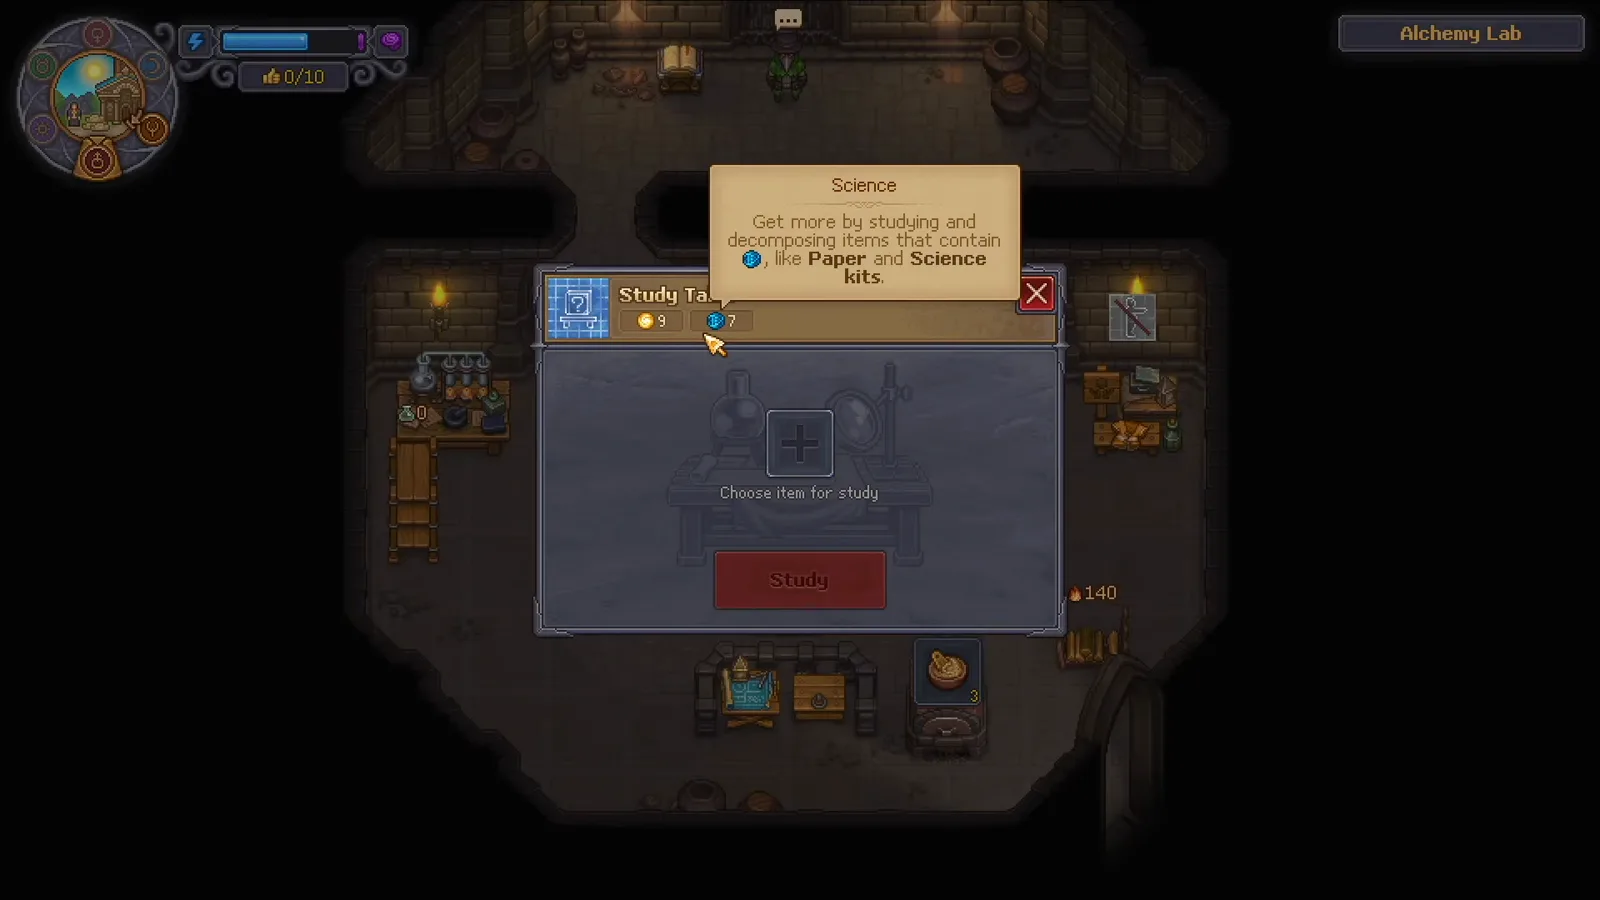
The Science tooltip names the items that feed research, which is why the Writing Desk and the church both matter to an alchemy plan. Source frame: Recreational Suffering at 0:04.
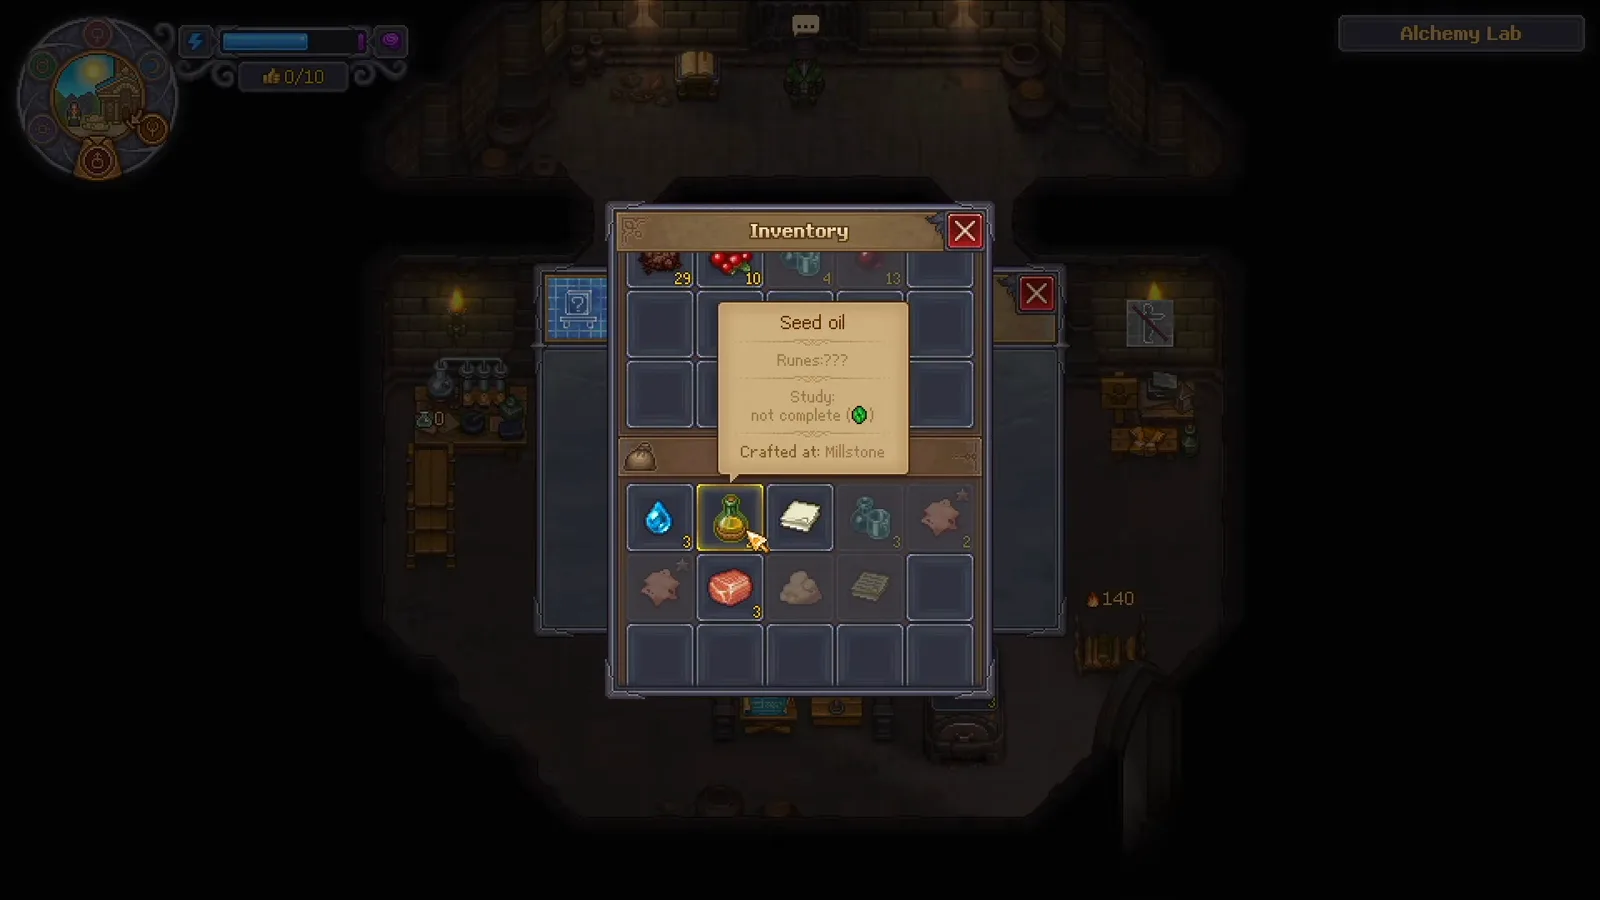
“Runes: ???” is the tell that an ingredient has not been researched yet, and the Labo will not accept it. Source frame: Recreational Suffering at 0:24.
3. Read runes as exact totals
Once an item is studied, its rune value is fixed, and the Labo compares the sum of your chosen ingredients against the formula:
- The match must be exact. Community research for patch 1.007 describes a system where the combined red, green and blue totals have to equal the target formula - no surplus runes and no shortfall. The same notes count 29 formulas, 62 ingredients and several thousand possible blend combinations, and they are labelled as data-mined community data rather than an official table.
- Slot count depends on the station. The community notes give Laboratory I a two-ingredient limit and Laboratory II three ingredients. The demo Labo in the walkthrough shows two ingredient slots.
- The Folio is your recipe book. The in-game tooltip is explicit: to craft something new you need to discover its formula, and all the formulas you have discovered are recorded in the Folio.
Demo-verified single values are narrow but useful: Stone gave two red runes and Blood carries one blue rune. The community list for 1.007 adds Water, Leaf, Stick and Berry at one rune of a single colour, Stone, Flour and Red Mushroom at two, and mixed ingredients such as Flax at one red plus one green and Ash at one green plus one blue. Keep the caveat in mind: that list is community data, not an official chart.
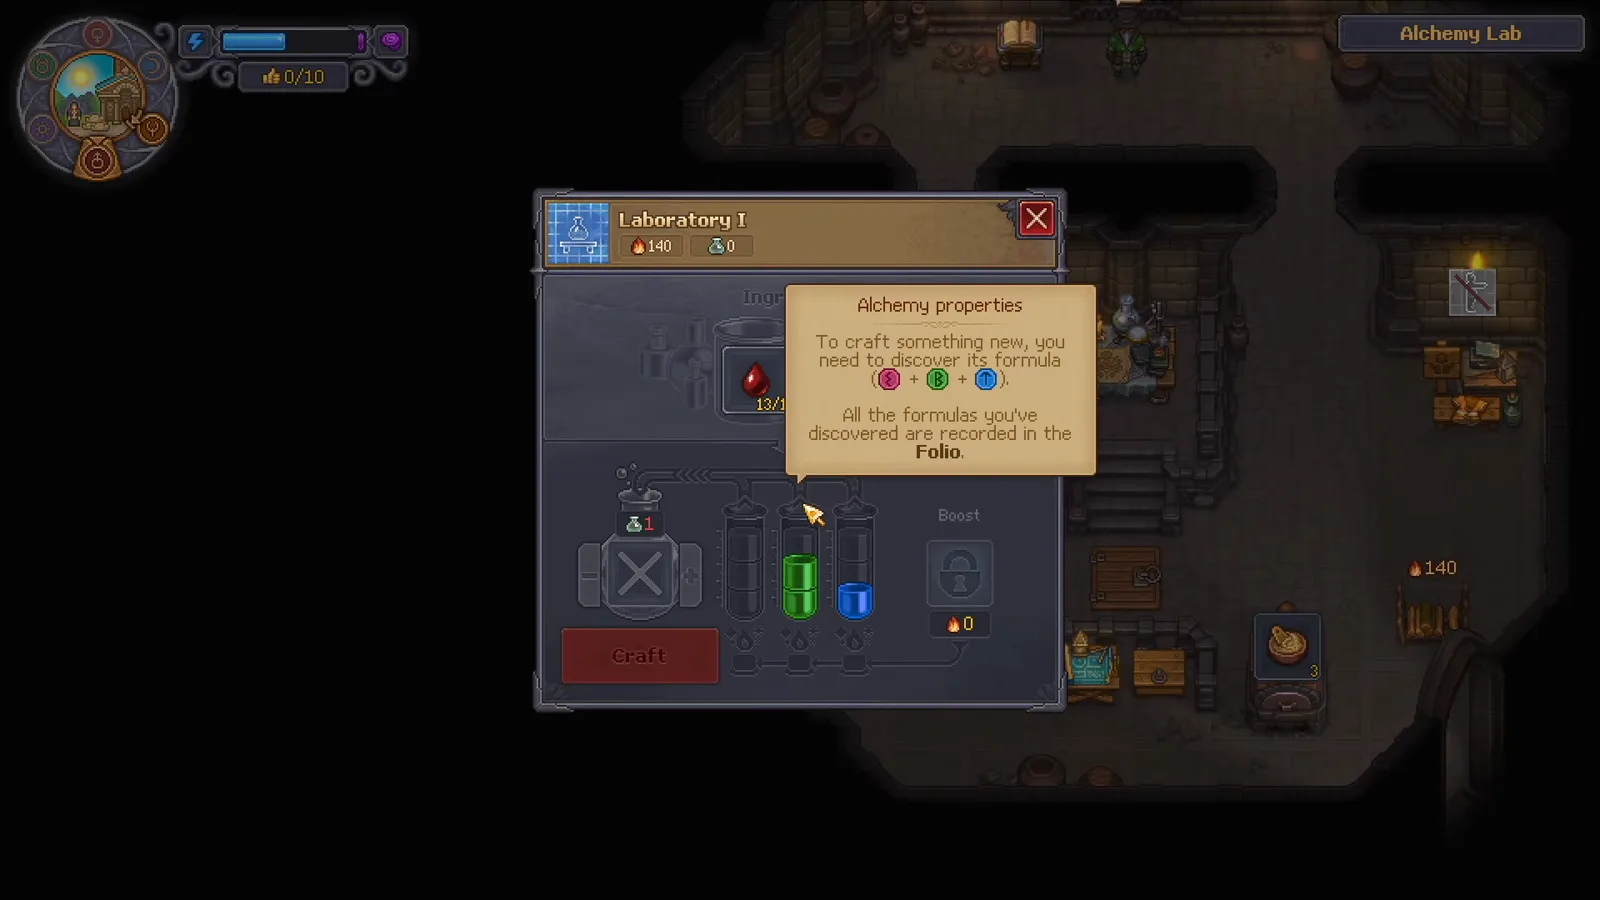
The rune lights above the Craft button are the check: the ingredients in the slot must supply the formula exactly. Source frame: Recreational Suffering at 2:25.
4. Mix in the Labo and load a flask
The Labo is where the abstract rune work becomes an item:
- Choose only studied ingredients. The ingredient picker shows the studied items you own; unresearched entries are greyed out or unavailable.
- Watch the rune indicator, not the item names. The panel displays the rune count the current mix supplies, so a wrong colour pair shows up before you commit materials.
- Add an Alchemy Flask. In the walkthrough a potion only completes with a flask loaded, and the Flask Shelf in the same room is where those bottles are kept.
- Craft, then work the action. As with study, the recipe runs through a work step rather than resolving instantly.
Flasks are the quiet bottleneck. Community data for 1.007 records Alchemy Flasks I at the Furnace: two Glass plus ten Fuel yields two flasks, which means glass and Fuel planning belong in any long alchemy session.
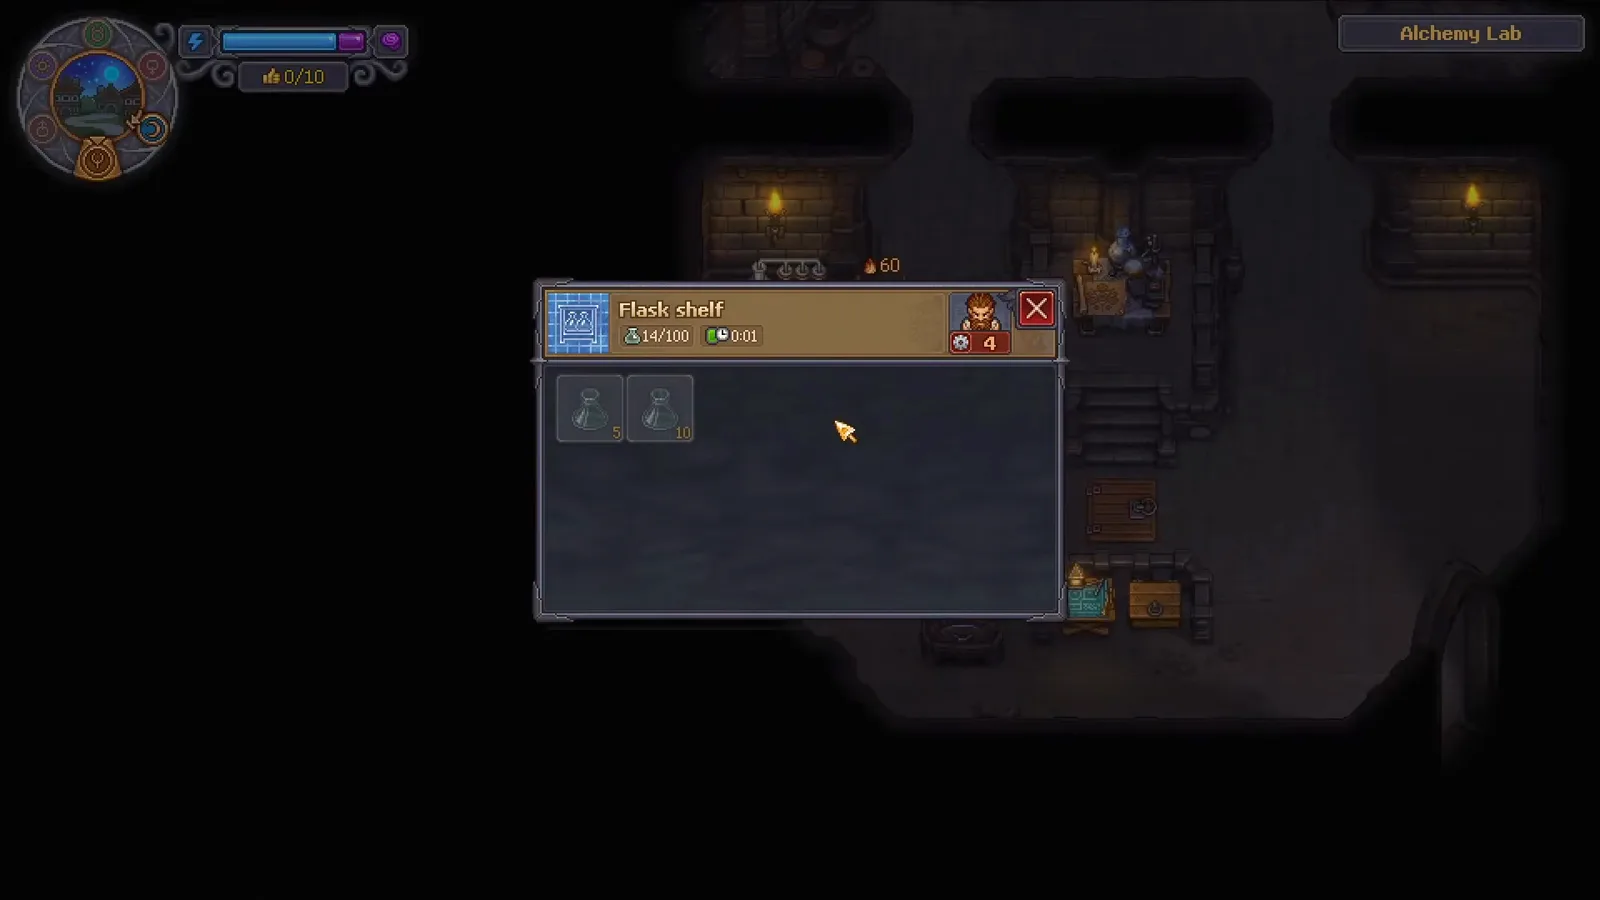
Crafting a potion consumes a flask, and the Flask Shelf is where those bottles live between sessions. Source frame: Sinxi at 1:27.
5. Recipes worth working toward
The demo Folio lists its discovered formulas with exact rune costs, and the checked walkthroughs demonstrate several of them at the bench. The table below records only what is visible on screen in those recordings:
| Recipe | Runes shown in the demo | Demo source |
|---|---|---|
| Healing Potion | 2 red | Folio, 3:41 |
| Healing Potion II | 4 red | Folio, 3:41 |
| Damage Potion | 1 red + 1 green | Folio, 3:41 |
| Damage Potion II | 2 red + 2 green | Folio, 3:41 |
| Zombie Motivator Potion | 1 red + 1 blue | Folio, 3:41 |
| Berserker Potion | 1 red + 1 green + 1 blue | Folio, 3:41 |
| Berserker Potion II | 2 red + 1 green + 1 blue | Folio, 3:41 |
| Preservative | 3 green | Three green-rune ingredients, 2:35 |
| Lacquer | 2 blue | Two Bloods (one blue each), 3:08 |
| Dream Dust | 1 green + 1 blue | Folio, 3:51 |
| Weak growth elixir | 1 red + 2 green | Folio, 3:51 |
Two worked examples are worth copying while you learn the system. Healing Potion is the simplest red recipe: the creator blends Stone with Stone, since each Stone supplies two red runes. Lacquer is the simplest blue one: two Bloods each carry one blue rune. The beginner walkthrough also proves the failure case - two green runes plus a blue rune is not a valid formula, and the game rejects the mix.
Treat the table as demo-era numbering. Community data for 1.007 still lists Healing Potion at 2 red, but pairs it with a stronger Healing Potion III at 5 red rather than a “II”, so a recipe name or tier can move between builds. The Folio in your save is the source to trust.
Dream Dust is the entry most players arrive looking for. The creator calls it the recipe that opens the zombie quest line, and the demo Folio confirms the one green plus one blue cost on screen. Community data gives the worked blend as Water (one green) plus Blood (one blue), and lists Dream Dust as an ingredient in Crop Boosting Fertilizer I and Fancy Incense. The full acquisition route is written up in the Dream Dust item guide.
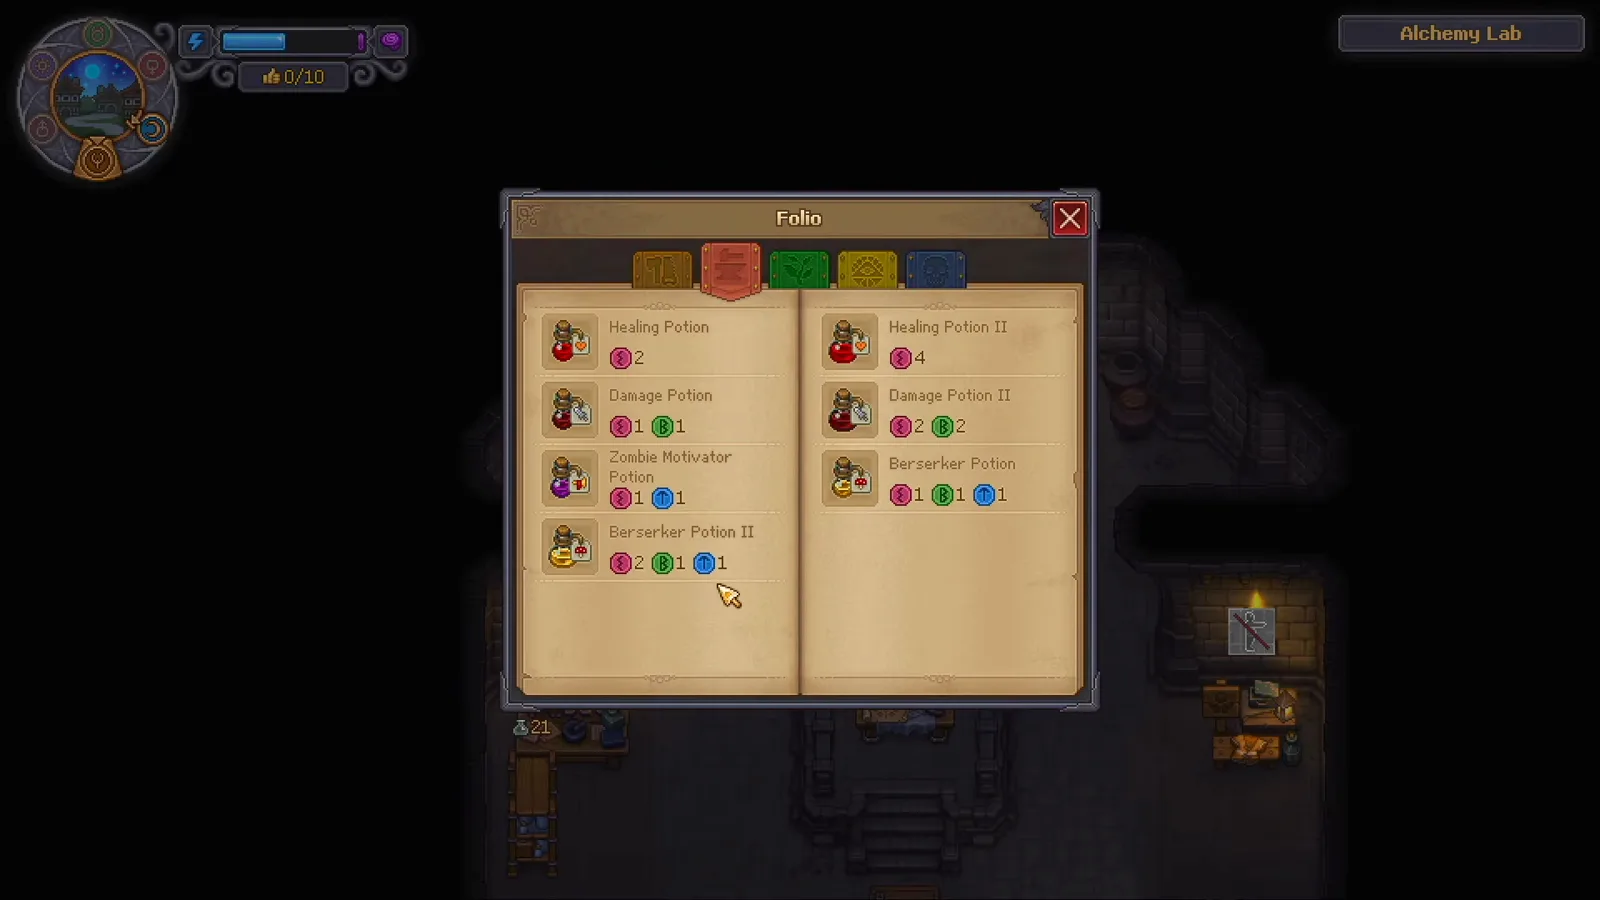
The red page of the demo Folio lists seven healing and combat recipes with their rune totals side by side. Source frame: Recreational Suffering at 3:41.
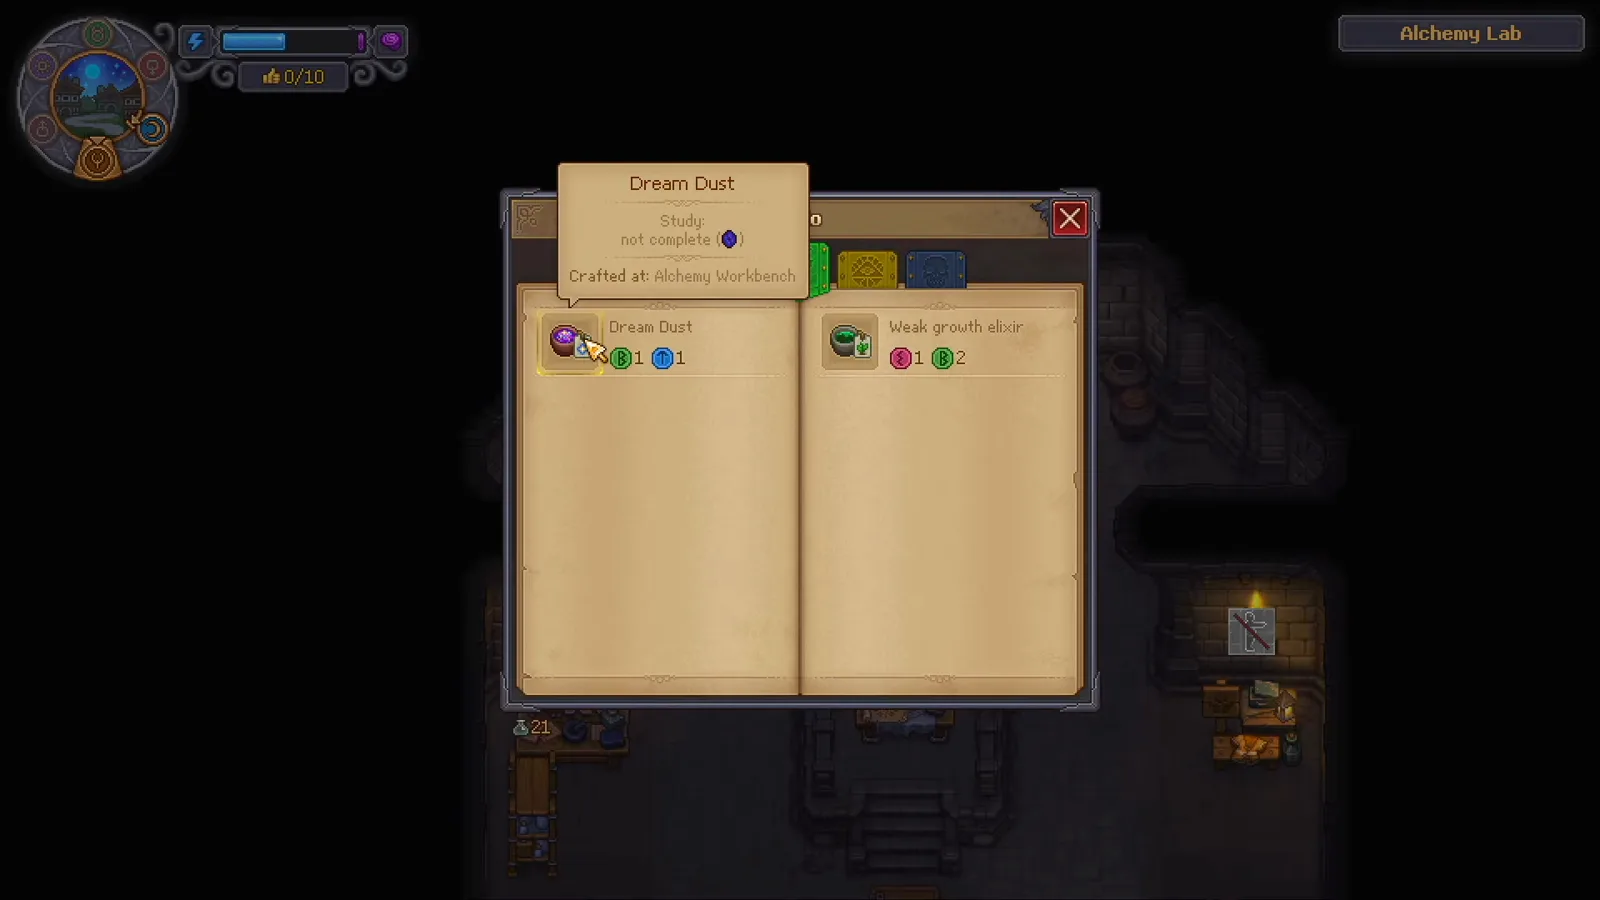
Dream Dust reads one green plus one blue in the demo Folio, which matches the community value and makes two single-rune ingredients enough. Source frame: Recreational Suffering at 3:51.
6. Organ Improver and the odd entries
The demo Folio also contains entries whose purpose the creators could not confirm, and they are worth knowing about so you do not burn Science chasing them early:
- Organ Improver. The walkthrough recipe is flower plus flower, and its tooltip promises “Creates best organ” beside a skull icon. The Folio entry carries a green rune badge of 4, which fits two flowers at two green runes each. The creator could not find where the potion applies before release and suspected it was not wired up yet, so treat the payoff as unverified rather than promising.
- Preservative. A three-green blend in the same run; no consumer recipe was demonstrated.
- Weak growth elixir and Spices. Both appear in the Folio, and the Spices tooltip says it improves drinks and food. Neither had a confirmed use in the recordings.
Community research for 1.007 is more specific about organ work than the demo: it records a set of organ-improvement recipes on the Formulation Bench, alongside candle, fertiliser and gold-transmutation recipes. Because that is data-mined community data and the videos are demo-era, do not assume the demo potion and the release recipes are the same thing.
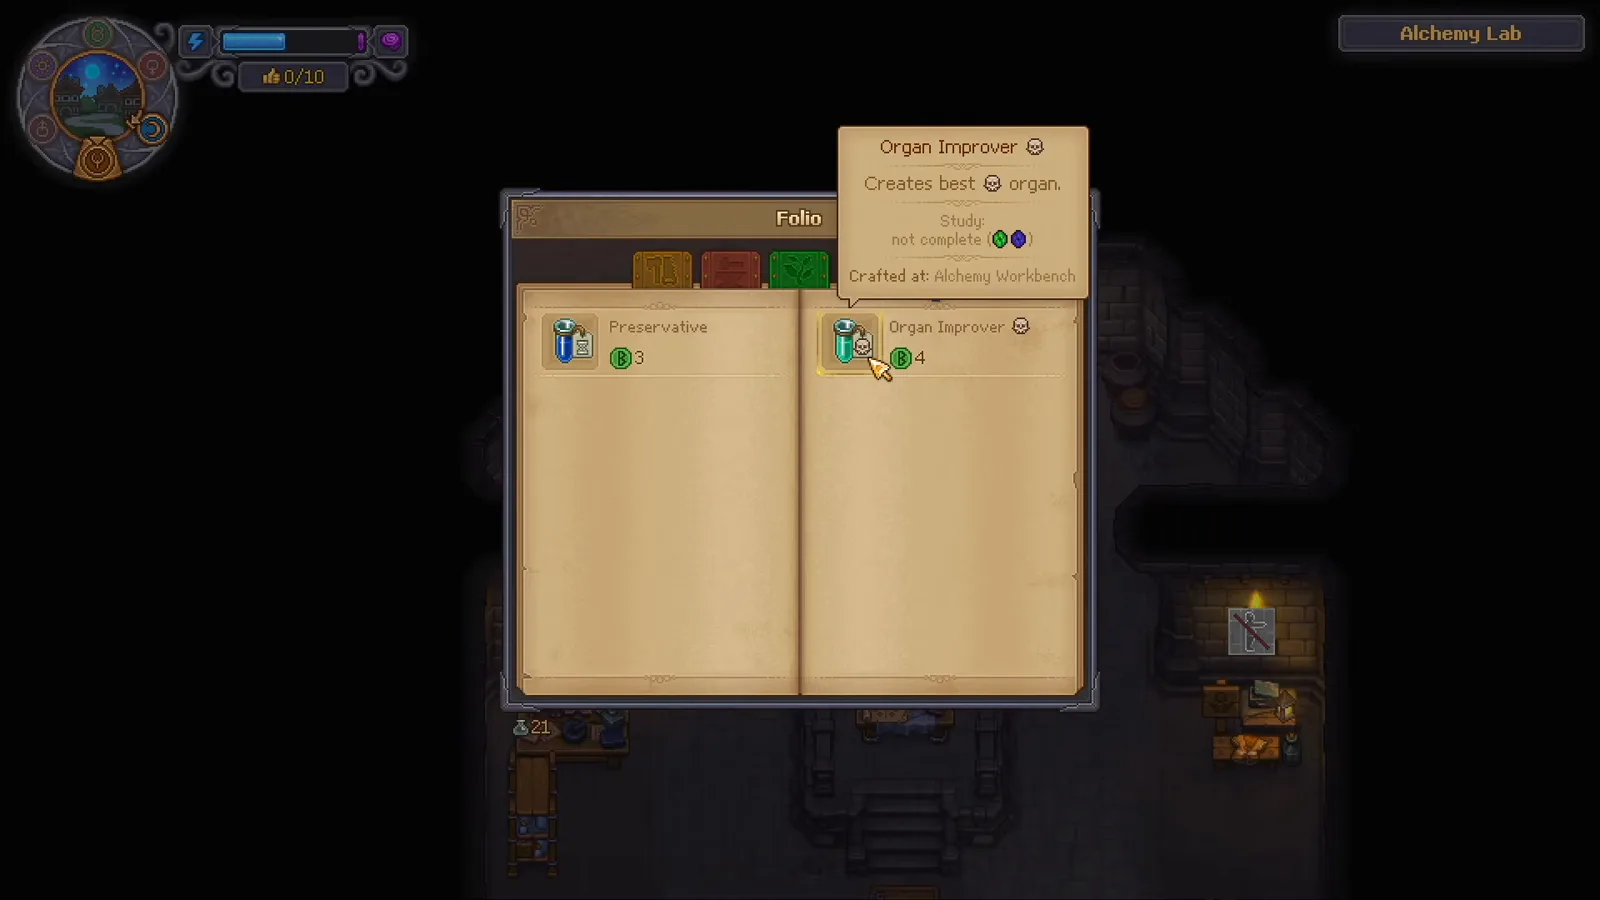
Organ Improver promises the best organ quality, and the creator could not find where it applies in the pre-release build. Source frame: Recreational Suffering at 4:28.
7. Scale alchemy with stations and materials
Early alchemy is a bench and a flask; the mid-game version is a production line. The stations below come from this site’s community research for 1.007, so read the numbers as data-mined community data:
- Formulation Bench (unlocked by Church Lighting I, built from 4 Wooden Plank, 4 Bronze Detail and 1 Polished Bronze) is the broad workbench: 36 recipes across mastery 1 to 8, including candles such as Simple Candle from 2 Beeswax and 1 Flax Thread, fertilisers, and gold transmutation.
- Gold transmutation is the alchemy route to money: 1 Iron Ore plus 1 Philosopher Stone yields 1 Golden Nugget, and an Iron Ingot plus a Philosopher Stone yields a Golden Ingot. The how to make gold guide compares that route with selling ore and filling Town Warehouse orders, and the Golden ingot item page covers the finished metal.
- Distillation Cube (Alchemy, Distillation; 2 Wooden Plank, 2 Bronze Detail, 12 Brick) is one of the automatic stations: it burns Fuel while processing, and the recorded recipe turns 1 Any Wine plus 2 Clay Urns into 4 Alcohol at 20 Fuel per craft. Fuel still comes from the Firewood shed conversion of 2 Firewood to 20 Fuel, so a distillation run needs a wood plan first.
- Flasks and glass come from the Furnace chain, and Flax - used for candle thread and Fabric - is a Garden Bed crop with its own mastery requirement. The Flax item guide covers that supply side.
For planning, the production calculator models a single recipe chain, while the factory production calculator is the better fit once zombies and conveyor lines are doing the hauling. If you are deciding where the Labo, Furnace and Firewood shed should physically sit, the layout guide and the automation guide both work from the same rule: materials are pulled from containers in the same area, and the Firewood shed feeds Fuel to the whole area. The tech tree guide explains the mastery nodes that gate these stations, and the zombie guide covers the workforce that keeps them running.
8. Alchemy checklist
Before spending a Science budget on experiments, confirm:
- The alchemy basement is unlocked and all three stations are reachable.
- The ingredient you want to use shows a rune value, not “Runes: ???”.
- The rune lights in the Labo match the formula exactly before you press Craft.
- A flask is loaded from the Flask Shelf, not left in your inventory.
- Science Kits and Faith are stocked, because every new study consumes both.
- Formulas you care about are written in the Folio, so a patch or a new save does not lose the recipe.
- Fuel and glass are planned if the session depends on the Furnace or the Distillation Cube.
Sources and verification
The gameplay steps and screenshots were checked on 2026-10-06 against two English walkthroughs recorded just before or on the 22 September 2026 release day (the primary one on the pre-release demo):
- Recreational Suffering’s 303-second “How Alchemy Works in Graveyard Keeper 2 (Organ Improver Potion!?)” is the primary source for the Study Table research flow, the Labo craft panel, the Folio entries (including Dream Dust and Organ Improver) and the demo rune values.
- Sinxi’s 239-second “How to Alchemy (For beginners)” independently supplies the unlock chain, the three-station layout, the Flask Shelf and the worked Preservative and Lacquer combinations.
Rune values, station costs and recipe tables attributed to “community data” come from this site’s GK2 facts record, which labels them as data-mined community data for patch 1.007 rather than official numbers. The demo footage is older than that patch, so this page keeps the two apart instead of merging them into one table. No price or rune value on this page was invented to fill a gap.
Related Articles
guides
Graveyard Keeper 2 Gold Guide — Fast Coin & Golden Nuggets
Graveyard Keeper 2 gold means two things: coin income and Golden Nuggets. Follow the water-to-paint sale and the sluice box route, checked frame by frame.
guides
Graveyard Keeper 2 Layout Guide — Yard Zones & Factory Lines
Plan a Graveyard Keeper 2 layout that works: zone same-area storage, respect the two-build grave limits, power the factory, then route belts tile by tile.
items
Graveyard Keeper 2 Dream Dust — How to Make It Step by Step
Dream Dust in Graveyard Keeper 2 takes 1 green rune and 1 blue rune at the Labo. Study Water and Blood at the Study Table, stock a flask, and mix it.
Was this helpful?
Thanks for the feedback!